CUTE BOAT ALBUM


Francesca Orlandi
Ciao a tutti!
Sono Francesca, forse qualcuno mi conoscerà come @FraRigheEPois.
Abito a Treviglio in provincia di Bergamo, sono sposata con Andrea e sono mamma di due bellissimi ragazzi che mi riempiono la vita, Michele e Gabriele di 13 e 12 anni. Sono loro a sopportare il disordine creativo che regna in casa nostra!
Amo lo scrapbooking, l’acquerello e il mondo della creatività in generale... da che mi ricordi ho sempre pasticciato con carta e colori, i muri di casa dei miei genitori ne sanno qualcosa!
Credo che la creatività sia una meravigliosa abilità che va allenata e coltivata e che il talento sia sopravvalutato: con lo studio, la pratica e la passione tutti possono diventare creativi!
Sito WebHello creative!
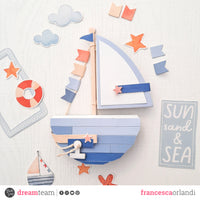
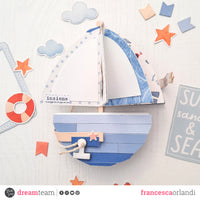
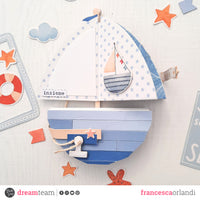
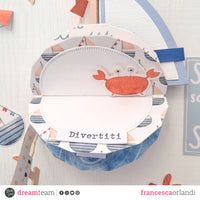
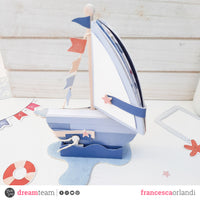
This time I share with you this mini album made using the new "Cute Boat" die set and the "Sunset on The Beach" paper collection by ModaScrap designed by the talented St'Officina: in this mini album both the boat and its sail will be the pages of the album. To make it stand up I also made a support, but it's up to you to decide whether to do it or not. Let's see together how the project is carried out.
STRUCTURE/BASE
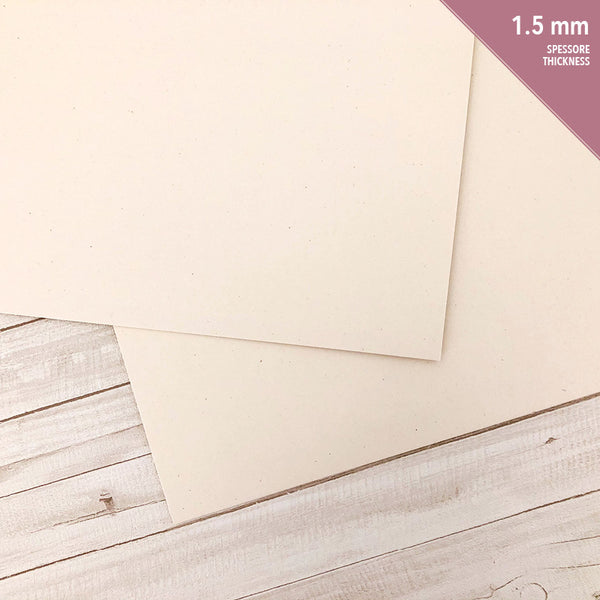
First of all I made the supporting structure and using the 1.5 mm vegetable cardboard I punched the hull once and the rod of the boat 3 times to give it solidity: I glued 2 rods onto each other and then I glued them on the BACK of the hull (the punch already indicates the notch up to where to glue them). Then I glued the third rod on top of the other 2, but this time on the FRONT of the hull. I coated the front and back of the auction with Double Face Pastel Blush paper.
SAIL PAGES
For the sail you need several blanks of the largest sail of the "Cute Boat" die:
- 10 sails in the “Sunset On the Beach” paper collection, equal equal pairwise design. Attention! For each patterned pair, punch once on the right side of the paper and once on the reverse (white part).
- 1 sail: die cut on the solid BLUE part of the Double Face “Pastel Frost” paper: this will go on the front as the cover
- 1 sail: punch on the polka dot part of the Double Face “Pastel Frost” paper: this will be used to cover the back of the sail.
- 5 pcs of white cardstock measuring 6.7 x 2 cm to fold in half (1cm): these are the flaps for binding pages.
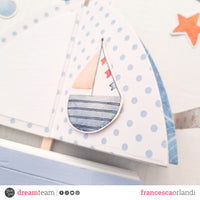
With the 6.7x2 cm cardboard folded in half that forms two flaps, I joined the first two sails matched by fantasy: each flap is glued on the white part of the sail so that the fantasy part remains entirely visible and facing the internal. I repeated this procedure for the other 4 pairs of patterns as well, obtaining 5 pairs of pages, which I then joined together by gluing the back of one to the back of the other. So I got a sort of sail-shaped booklet. On the white front side I glue the sail obtained from the blue Double face paper.
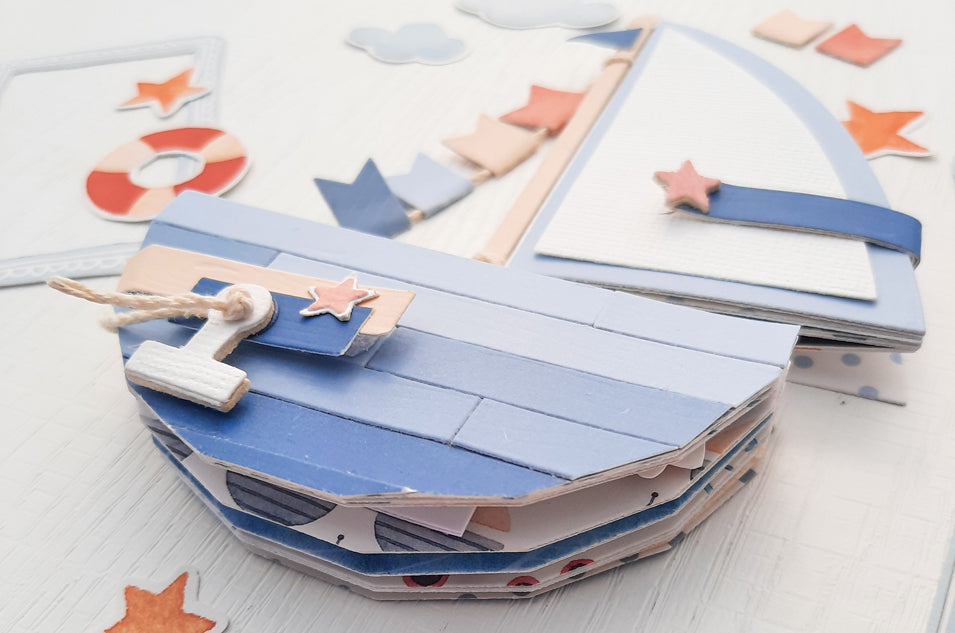
Then with a wood-effect strip of the "Spring Basket" die set, I create the strip that is used to keep the pages closed: a piece of about 1 or 2 cm should be well fixed on the back, on the last white side, while the other part is glued on the cover but using an attach / detach adhesive (for example Pritt glue in roller version) or with soft velcro to open and close. Now that I have properly secured the closure, I also cover the back with the sail made from the Double Face “Pastel Frost” paper.
To fix the "booklet" to the vegetable cardboard rod I used 20 cm long twine. I drilled two holes ONLY on the central page: I made a hole about 1 cm from the top and 1 cm from the bottom. I made a double knot at the end of the thread, then with a needle I came out of the hole at the bottom, going from the inside to the outside of the page, I entered and exited the rod, I walked around the rod itself and re-entered the same hole on the page from which I had left (the one at the bottom). Then I went up to the hole at the top and did the same thing: I came out of the hole, I “stabbed” the rod as I did before, I twisted the string around the rod and went back into the same hole on the page I was from (the one up). Finally I made a double knot to secure everything.
To create the rope with the colored flags you need about 15 or 20 cm of twine: I make a knot at the end, then with a needle I enter from right to left, in the hole of the rod at the top (the same used for the binding of the sail ). Along the rope, I glue the small colored banners of the “Cute Boat” die set, finally with the thread I go down and glue the string very well to the vegetable cardboard hull (on the front). This part will then be covered by the pages and will not be seen again.
HULL PAGES. equal to two by two by design
You will need various pieces of the HULL of the "Cute Boat" die set:
- 10 "hulls" in the "Sunset On The Beach” paper collection card (equal pairwise design)
- 1 "hull" in the Double Face “Pastel Frost" paper which will be glued on the back of the vegetable cardboard
- 1 "hull" of white cardboard that will be glued on top of all the pages and will be the basis of the actual cover of the mini. I coated it with the wood-effect strips of the "Spring Basket" die set using Double Face paper in the colors "Pastel Frost", "Pastel Sky" and "Pastel Royal Blue".
- 5 pcs of 8.2 x 2 cm white cardboard to fold in half (1 cm): these are the flaps for joining and binding the pages.
With the 8.2 x 2 cm white cardboard folded in half that forms two flaps, I joined the hulls in pairs matched by fantasy: each flap is glued on the white part of the hull so that the patterned part remains entirely visible . I repeated for all 5 patterns, obtaining 5 pairs which I then joined together, always gluing the part without the design. At this point you will have a booklet in the shape of a boat. On the front I glued the hull in white cardboard covered with wooden strips and embellished to create the cover. With a wood-effect strip of the "Spring Basket" die, I also create the strip that is used to keep the pages closed: a piece of about 1 or 2 cm must be fixed well on the back of the pages and the other part must be glued on the cover but using an adhesive attaches/detaches either with soft velcro or with a magnet. Finally I attached the pages on the front of the supporting structure in vegetable cardboard prepared previously. With the “Dashing Circles” die (measuring 6.9 cm) I create circles to glue on the pages: they will be the background to the photographs. To embellish I used the “Sunset On The Beach” Die-Cuts.
SUPPORT
The support is a kind of box measuring 5.8 (W) x 2.1 (W) x 1 (H) cm, glued on a light blue base in 1.5 mm vegetable cardboard. I leave you the necessary items and the related measures:
1.5 mm vegetable cardboard:
- 2pcs 5.8 x 1cm (front and back)
- 2pcs 1.8 x 1 cm (hips)
- 1 pc 5.5 x 1.8 (bottom)
- 1 die cut of the blue colored "Waving Elements" die, I used Fluffy Light Blue Gray.
Covering Paper Neutral Bianca (covering only the external part of the box):
- 2 pcs 6.8 x 2.8 cm (front and back)
- 2 pcs 2 x 2.8 cm (hips)
Double Face Pastel Royal Blue paper with the longest top edge cut in wave type with the "Waving Elements" die.
- 1 pc 6 x 1.8cm (front)
- 1 pc 6 x 3 cm (back)
Construction of the "box / support":
I glue the two small sides to the bottom of the box, staying on the outside of the bottom itself and NOT placing them on top! Once these are firmly in place, glue the two long sides, always staying on the outside of the bottom. When these are dry too, I begin to cover the box.
First I cover the two long sides by overlapping all 4 sides by about 0.5 cm and glue. Then I glue the two short sides that also overlap by 0.5 cm, but this time only towards the inside and towards the bottom of the "box". Finally I glue the box to the blue base. To complete, I glue the two wave-shaped pieces of Double Face Pastel Royal Blue paper: the highest goes behind and the lowest goes in front.
The project is finished and I hope it inspired you! If you decide to make it too, if you like, remember to tag us we will share your beautiful work!
Thanks and good creativity!
Francesca.

Francesca Orlandi
Ciao a tutti!
Sono Francesca, forse qualcuno mi conoscerà come @FraRigheEPois.
Abito a Treviglio in provincia di Bergamo, sono sposata con Andrea e sono mamma di due bellissimi ragazzi che mi riempiono la vita, Michele e Gabriele di 13 e 12 anni. Sono loro a sopportare il disordine creativo che regna in casa nostra!
Amo lo scrapbooking, l’acquerello e il mondo della creatività in generale... da che mi ricordi ho sempre pasticciato con carta e colori, i muri di casa dei miei genitori ne sanno qualcosa!
Credo che la creatività sia una meravigliosa abilità che va allenata e coltivata e che il talento sia sopravvalutato: con lo studio, la pratica e la passione tutti possono diventare creativi!
Sito Web