AMAZING SNAIL MAIL


Marika Sinerchia
Mi chiamo Marika, sono sposata con Alessandro e sono mamma di due quadrupedi: uno di tg XXL e l' altra XXS Di giorno lavoro tra i colori e le tendenze della biancheria intima, dell' abbigliamento e delle calze e di notte mi immergo nei colori e nelle fantasie del cardmaking, scrapbooking, papercrafting... Amo questo mondo di condivisione, di continua sperimentazione, di studio, di ispirazione, di tecniche e di materiali ...e spero, attraverso i miei progetti, di poter trasmettere le infinite possibilità di interpretazione che questo mondo regala... Amore, impegno e professionalità saranno la mia parola d' ordine!
Sito WebHello everyone!
Over the last few months, I’ve been quite into flip books and embellishments in general.
I then discovered a practice within the crafters world which I fell in love with- it is called «Snail Mail» and it goes with the idea of exchanging unique presents that can be used to create new projects. Is it not a perfect example of energy preservation?
«Where everything changes, energy doesn’t perish, instead it changes its form and it preserves itself for ever».
I really love the idea that a present I’m making will be transformed into something totally different! When talking about Snail Mail, the following are surely a must:
- A letter to send a message to your new friend
- A tag to ask any questions that your pen pal can answer when sending his/her Flip book back
- The goodies some little extra gifts that your pen pal can use for his/her creations.
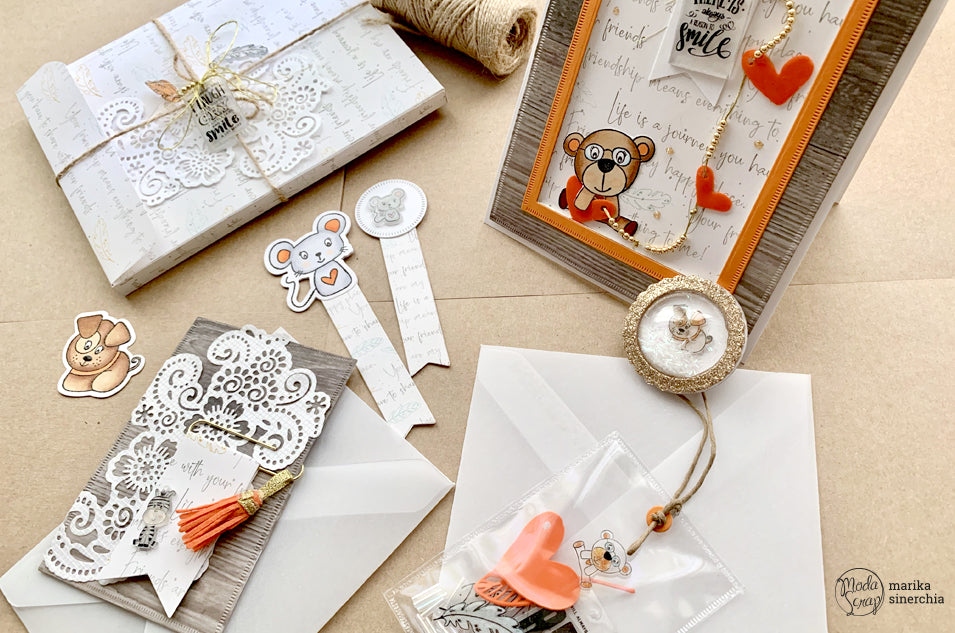
There are so many ways to create a FlipBook, so many layouts, this time round I began with the inner elements and then built the structure around them. Let’s begin with the goodies:
First of all, I cut the cute little characters from the *Color of Puppies Girl* clear stamp set, I colored them with the Copic and then I die-cut them with the combined die set.
I made the little miniatures with the polishrink, which is a sort of «magic» plastic and when heated it shrinks its original size by around 60%. I prefer to use the sepia polishrink when creating little colored figures, with the StazON I punch the shiny side and then use colored pencils for the uneven side without insisting too much as the color tends to darken when heated.
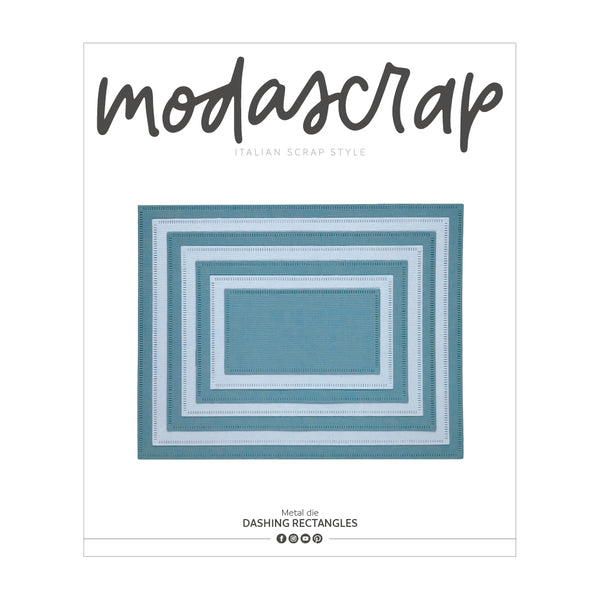
With the StazOn, I cut the feathers (from the *Feathers* set), the 2 big signs from the *Best Friend Forever* kit as well as the «There is always a reason to smile» sign on the clear glossy polishrink. Then I die-cut them with *Dashing Rectangles* die’s rectangle num. 6 and made a hole in the top with the Crop à Dile.
I heated them with the embosser and created my charms. With the colored polishrink I die cut hearts from *True Love* set), I drilled and heated them with the embosser.
Here is how I made the tags:
I die-cut the pattern card from the *Best Friend Forever* paper pack as well as some 300 gr. white cardboard with the Banner num. 4 (*Banner* die) and I attached them together with some double sided tape.
On a tag, I attached the mouse previously colored with some Copic (I die-cut an extra mouse shape just to hide some possible smudges). On the other, I attached the circle which I die-cut with circle from the *Dashing Circles* die set and the little polishrink miniature.
I die-cut 2 rectangles n3 from the *Dashing Rectangles* set, I cut a 2.5 x 13 cm stripe, which I only attached the excess parts of in the back side of my card.
I die-cut the flower lace with the new special white gauze paper and I put it in the front side. I secured the lace on the card with a clip which I previously embellished with the Banner die. I folded it in half and decorated it with the zebra miniature. On the side, I applied a little tassel.
The tassel has been made using the Dream Flower die (a tutorial video for it is available in Italian)
I made a clear sachet with the fuse toll and inserted all my little charms. I die-cut 2 frames for my card using the Dashing Rectangles die and I attached them to the pattern paper with a double sided tape. I added my little bear as well as the mini hearts as per picture and on top I added my sentiment charm with the help of some ribbon.
I made two envelopes with the ModaScrap vellum: one for the card and the other one for the goodies. The dogs have both been made with the ModaScrap adhesive paper.
To contain everything, I made an embossed envelope and closed it off with some twine and a few charms.
I hope you enjoyed this project.
Happy crafting everyone!
Kiss Kiss. Marika.


Marika Sinerchia
Mi chiamo Marika, sono sposata con Alessandro e sono mamma di due quadrupedi: uno di tg XXL e l' altra XXS Di giorno lavoro tra i colori e le tendenze della biancheria intima, dell' abbigliamento e delle calze e di notte mi immergo nei colori e nelle fantasie del cardmaking, scrapbooking, papercrafting... Amo questo mondo di condivisione, di continua sperimentazione, di studio, di ispirazione, di tecniche e di materiali ...e spero, attraverso i miei progetti, di poter trasmettere le infinite possibilità di interpretazione che questo mondo regala... Amore, impegno e professionalità saranno la mia parola d' ordine!
Sito Web